Manual
1Logging in
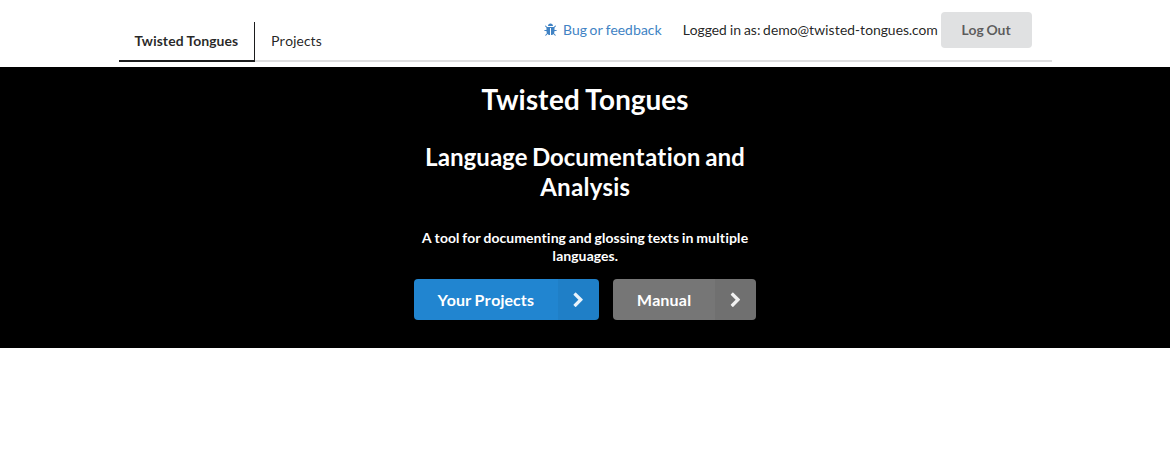
Anyone can login to TT using an google oauth email account (any google workspace account or gmail account). Upon logging in (Figure 1), a user will have access to all projects (see section 2) that have been created by or shared with that email account. The user can access the projects either by clicking on the blue "Your Projects" button in the middle of the landing page or by clicking on the "Projects" tab at the top of the page.
Figure 1. Landing page after login.
2Projects
2.1Opening a project
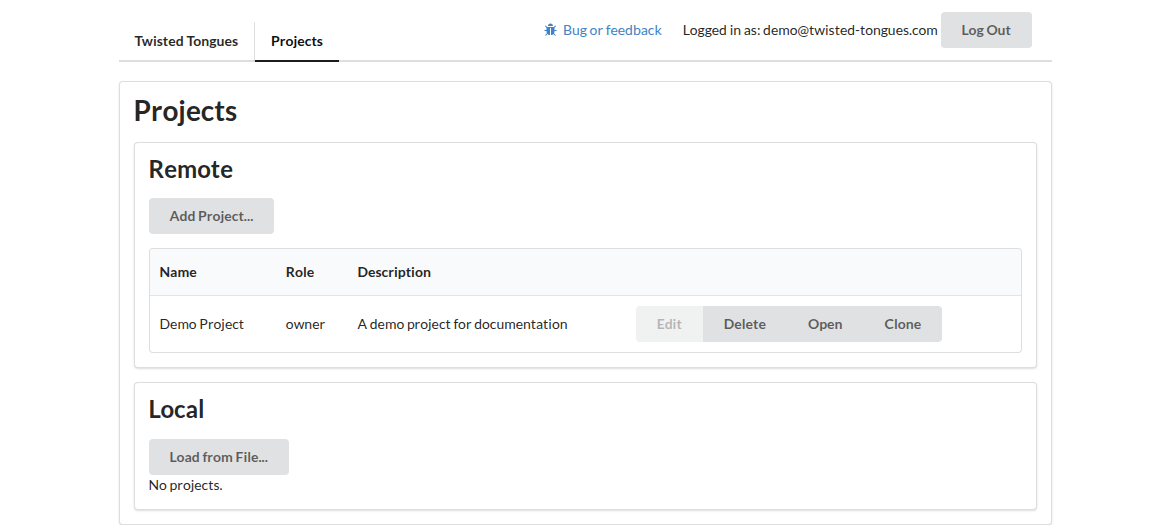
Projects are sets of passages associated with a single research project. It is recommended that users create a different project for each distinct language for which data is entered into TT. Projects can be viewed from the “Projects” tab (Figure 2). Within the Projects tab, users will see every project they have created, together with those that have been shared with them, under two headings: “Shared projects” for those that have collaborators — whether you invited somebody to a project of yours, or somebody invited you to theirs — and “Private projects” for those that have none. A heading appears only when there is something under it, so a user who has never shared anything sees a single list. Each row also names your role in that project — owner, writer or reader — and the address of the person who owns it.
Clicking anywhere on a project's row opens it, giving access to the Dictionary, Word Search and Passages for that project, and to data entry. Everything else that can be done to a project sits behind the menu button (⋮) at the end of its row: “Rename…” changes the project's name and description; “Save to computer…” downloads the project as a file (see section 2.3); and “Delete…” permanently removes the project for everyone who can see it, after asking you to type “delete” to confirm. Rename and Delete are for the project's owner only; everybody else still sees them in the menu, greyed out and marked “owners only”. Save to computer is available to anyone who can open the project.
Figure 2. Projects tab, with a project's menu open.
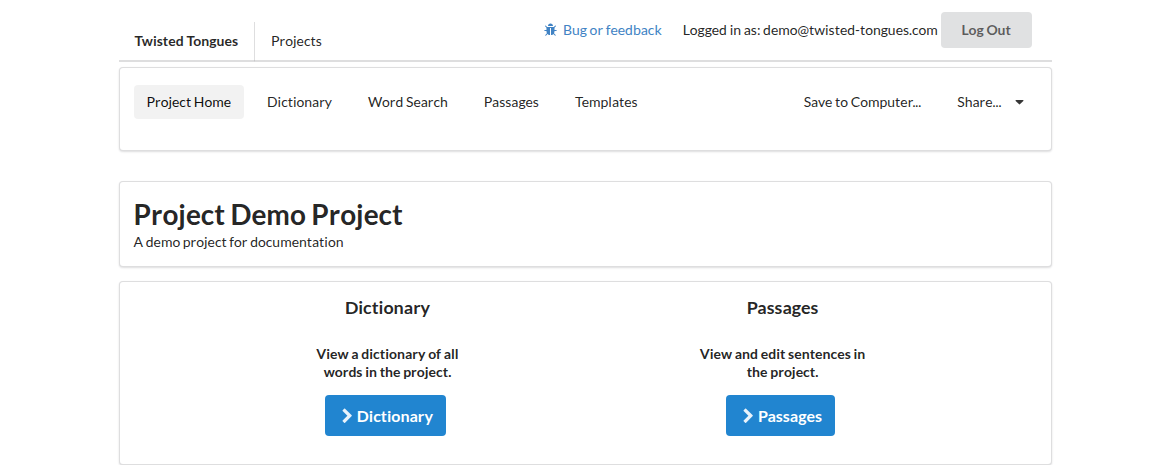
Upon opening a project (Figure 3), a user will see a Dictionary and Passages buttons in the middle of the page, useful for browsing data, as well as a menu across the top of the screen, including “Dictionary, Word Search, Passages,” and “Templates” tabs (the latter is only present for “writers” (editors) of the project). Each of these tabs is discussed in turn, beginning in section 3.
Figure 3. Menu from opening a project.
2.2Adding a new project
To create a new project, navigate to the “Projects” tab. Click “Add Project.”
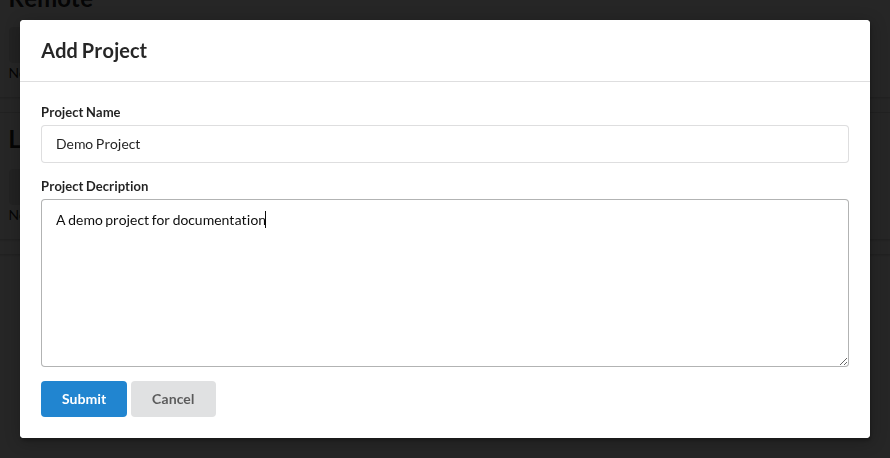
A pop-up window will appear (Figure 4). In the “Project Name” box, the user can type in the name they wish to give the new project. In the “Project Description” box, the user can type in a description of the project. Only a Project Name is required to create a new project. Click the “Submit” button to finish adding the project. The new project will appear in the list of projects.
Figure 4. “Add project” pop-up window.
2.3Saving a project to your computer
Any project can be saved to your own computer as a single file. Open the project and click “Save to Computer…” at the top right of the menu bar, or, without opening it, choose “Save to computer…” from the project's menu in the Projects tab. The browser will download one file named after the project (for example, “Florble fieldwork.json”) holding a complete snapshot of the project at that moment — passages, sentences and templates. Anyone who can open a project can save it, readers as well as writers.
See the export format page if you would like to read the file yourself, rather than load it back into TT.
2.4Loading a project from a file
A saved file can be loaded back in from the “Projects” tab: click “Load from File…”, and TT will report what it found in the file — its name, description, and how many passages, sentences and templates it holds — before creating anything. Loading always creates a new project, and never adds to or restores one that already exists, so a file that turns out to be the wrong one cannot damage work already on the server. The new project is yours, on the server, and can be shared like any other.
Files written by any earlier version of TT load as well, and keeping every file TT has ever written loadable is a commitment we intend to keep, as far as we are able; the oldest of them predate templates, so a project loaded from one will have none.
3Templates
The “Templates” tab allows a user to create a template, or multiple templates, for data entry, to be used in data entry in the Passages tab (see section 4). The use of templates is highly recommended in order to maintain consistency in track names and types across passages within a project.
3.1Adding a template
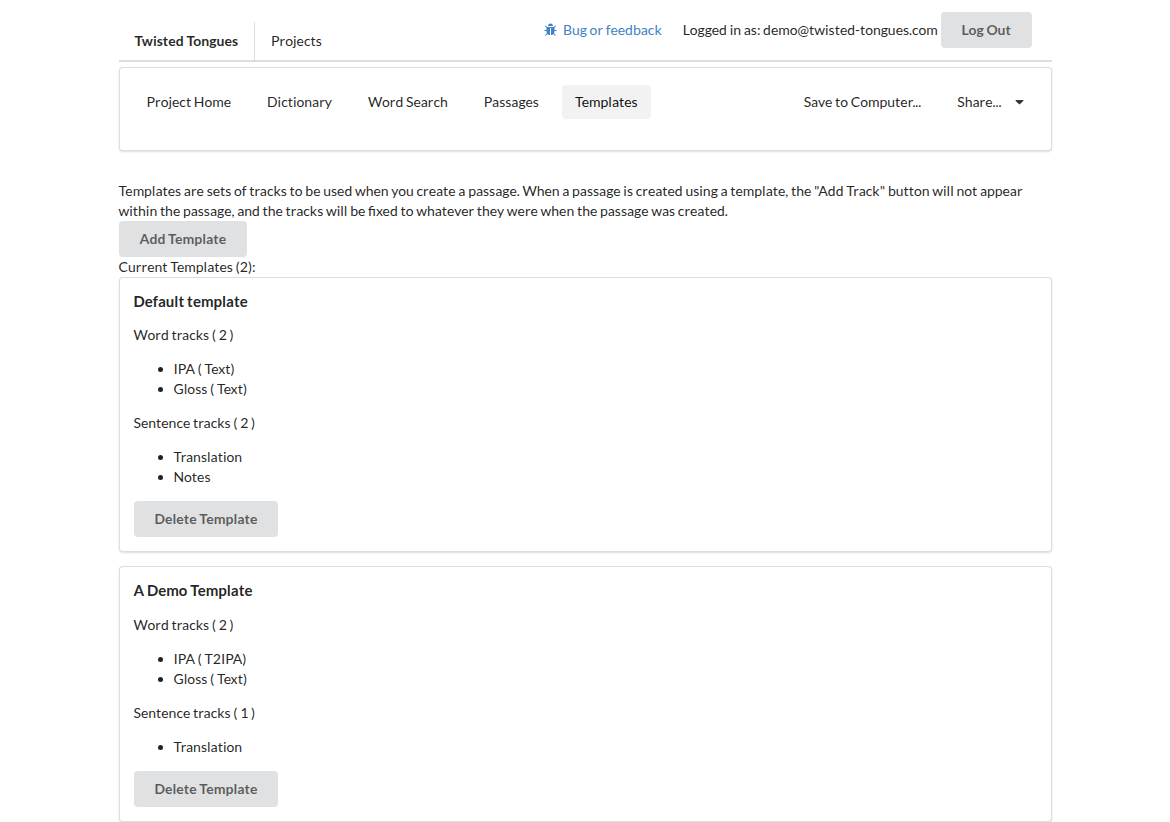
Upon clicking on “Templates” a user can click “Add Template” to create a new template (Figure 5).
Figure 5. “Templates” tab.
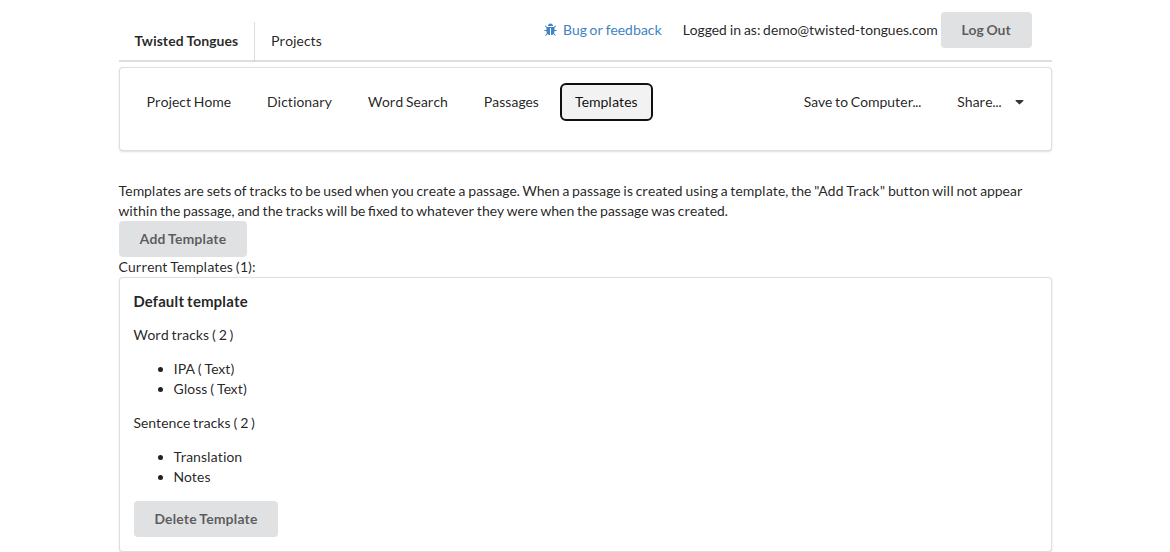
The steps to create a template are as follows:
- The user will be asked to name the template (Figure 6).
- “Add Tracks” for the number of distinct lines (tracks) desired for each utterance entered into the database (Figure 7). Once a track is created, the user lands on the Template Name pop-up where they can add another track or click “Submit” to save the template (Figure 8). For example, if entering a traditional three-line gloss, one would add three tracks to a single template, where the three tracks are perhaps named “IPA”, “Gloss,” and “Translation” (Figure 9).
- For each track added, select a “name” and “type”. The “name” field is open-ended, and will be used and referred to in the Word Search tab (section 5) and Dictionary tab (section 6). Track types, selected from a drop-down list, are discussed in section 3.2.
- After adding all desired tracks for a particular template, click “Submit” to save the template. This will add the new template to the template list (Figure 10).
Note that when templates are recommended, it is also possible to add distinct tracks (with different names + types) independently for each passage in the Passages tab.
Figure 6. Add template.
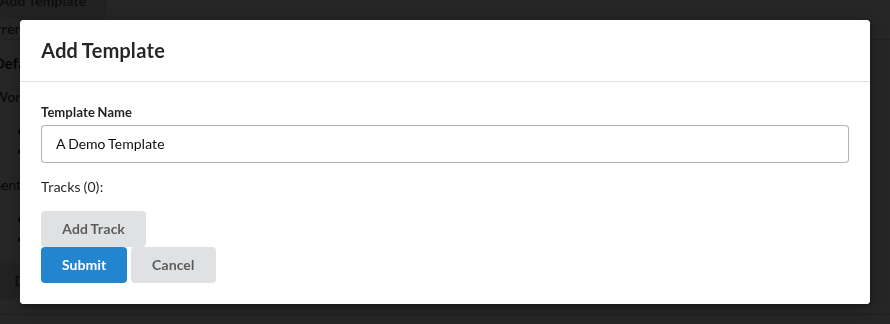
Figure 7. Add track.
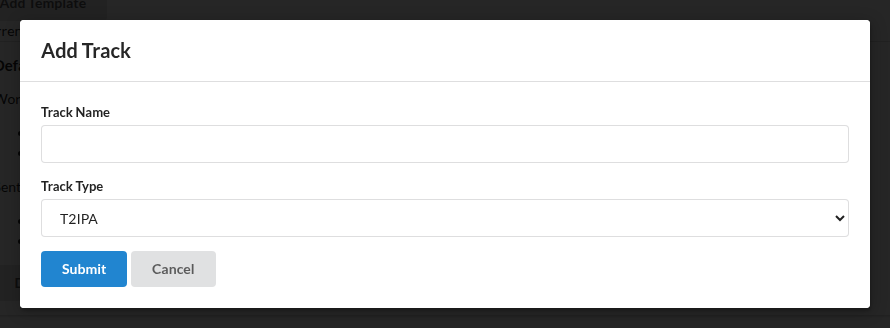
Figure 8. Name the track.
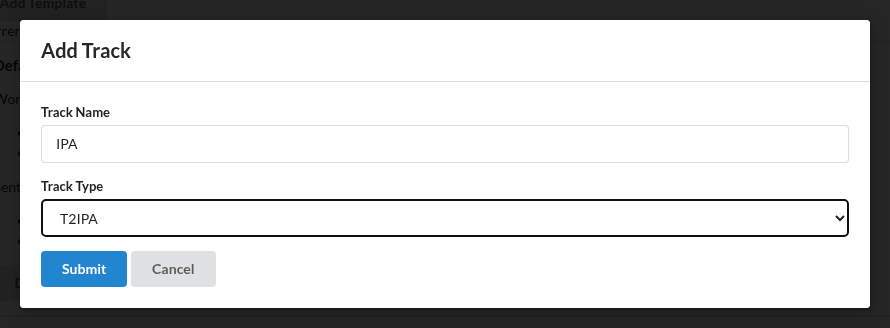
Figure 9. Adding three tracks (to save the template, click “Submit.”)
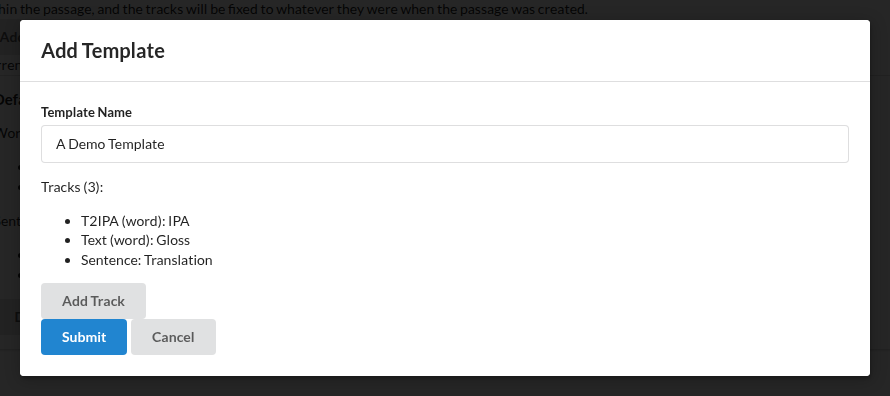
Figure 10. New template is in the template list.
3.2Track types
The “type” determines how data is entered and aligned for that particular track. All tracks of the “Text” and “T2IPA” types will be aligned with each other at word boundaries. These are best used for transcriptions + corresponding glosses, and perhaps morpheme- or word-specific tags. The “Full sentence” type, on the other hand, has a single text entry blank for each utterance, and is best used for translations and notes. In the Text and Full sentence track types, any unicode character can be entered and will be viewable and exportable appropriately. In the T2IPA track type, a user enters code for IPA characters based on the tipa LaTeX package, which then appears underneath the entered code in the Passages and Word Search tab. Data entry in any track type should export appropriately to any export type (so whether you enter your IPA line in a Text or T2IPA track type, it will export correctly to both plain text and LaTeX format). The number of templates is not limited.
4Passages
Passages can be divided however the user decides makes the most sense for a given project. Each passage could correspond to a text, an elicitation session, or some larger or smaller chunk of data. Passages are made up of sentences, which are made up of tracks.
4.1Creating a passage
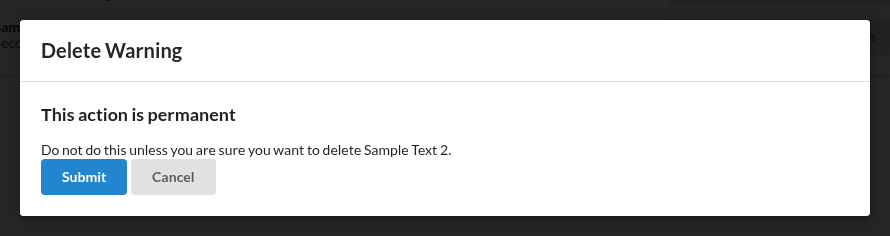
To create a passage, go to the Passages tab, and click on “Add Passage”. Name the passage and describe it. If desired, passage metadata can be stored in the “Description”. It is recommended upon creating a passage to choose a previously defined template of tracks (see section 3), which will be present in each sentence in that passage. To choose a template, select one from the drop-down menu labelled “Tracks from template” (Figure 11). Alternatively, the user can select “None” in the drop-down menu and can customize the tracks added for the specific passage. Upon clicking “Submit”, the passage will be created and added to the list of passages in the Passages tab (Figure 12). Each passage's row ends in a menu button (⋮). “Rename…” there changes the passage's name and description, and “Delete…” removes the passage, after asking you to confirm that you would like to permanently delete it (Figure 13). Readers see no menu.
Figure 11. Add passage and select template.
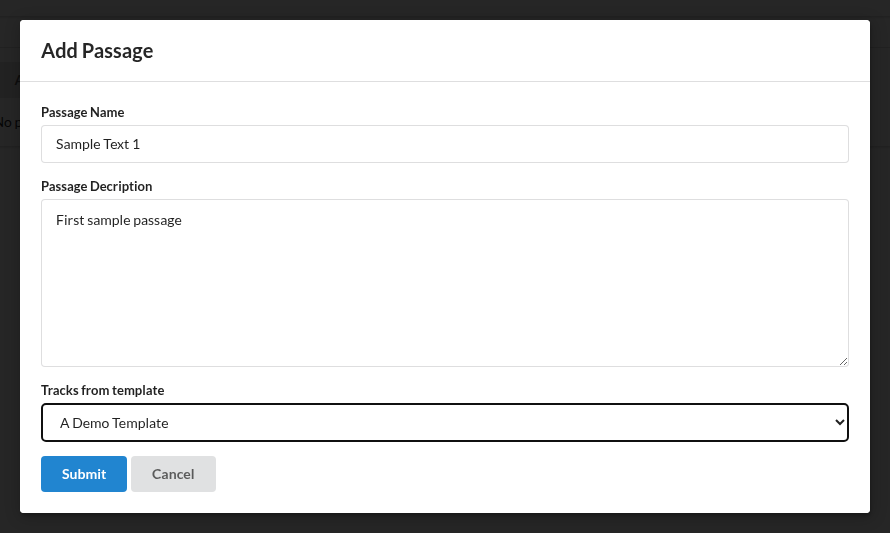
Figure 12. List of passages, with a passage's menu open.
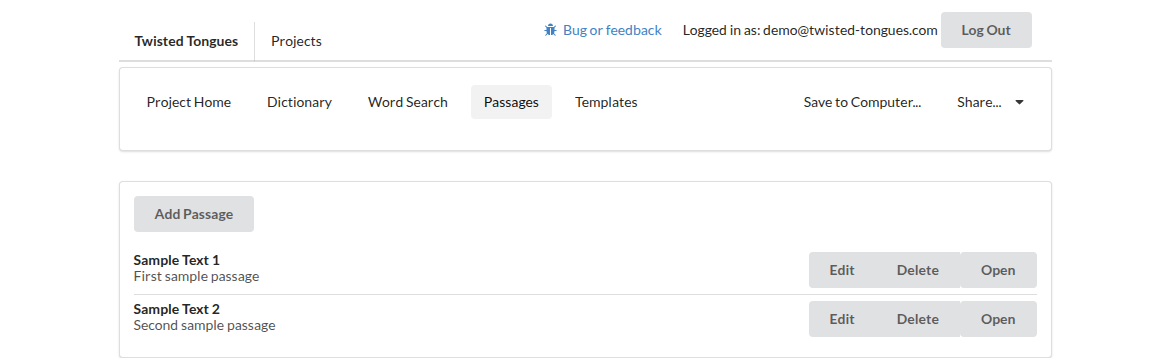
Figure 13. Delete passage.
4.2Entering data into a passage
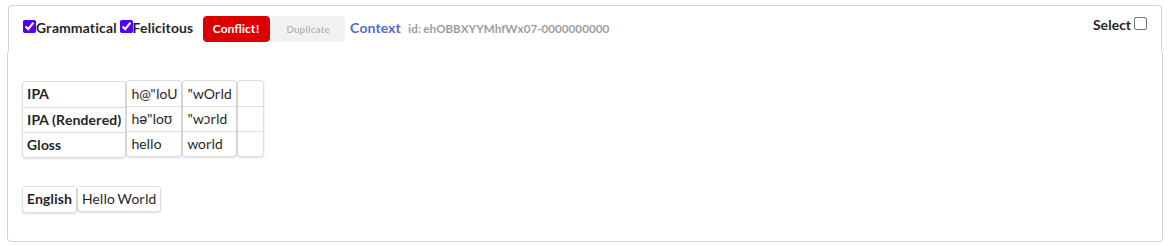
In the Passages tab, click a passage to view and edit the data in it. If no data has yet been entered for the selected passage, the passage will be empty. To add sentences to be filled in, click “Add sentence”. If a template has been selected for the passage, tracks associated with that passage will appear upon adding a sentence. One can then type to enter data into the sentence. Each new sentence added is by default marked as “Grammatical” with a checkmark in the upper left corner of the utterance. To mark a sentence as ungrammatical, un-check the box. Each sentence is likewise marked as “Felicitous” by default; to mark a sentence as pragmatically infelicitous, un-check that box (see section 5.1.3 for how both markings affect search and export). Upon adding data to a sentence (Figure 14), the green “clean” button will change to a yellow “dirty” button, meaning that the added data is unsaved (Figure 15). Before leaving the page, you will be prompted to save all newly entered data. If there are conflicts with multiple users attempting to edit the same sentence simultaneously (or if a single user tries to save two versions of the same sentence before the page has backed up the first change), a red “Conflict” button may appear (Figure 16). If this is the case, simply refresh the page. To add additional data, click “Add sentence”, and repeat the above process.
Figure 14. Add sentence, before typing in the data.
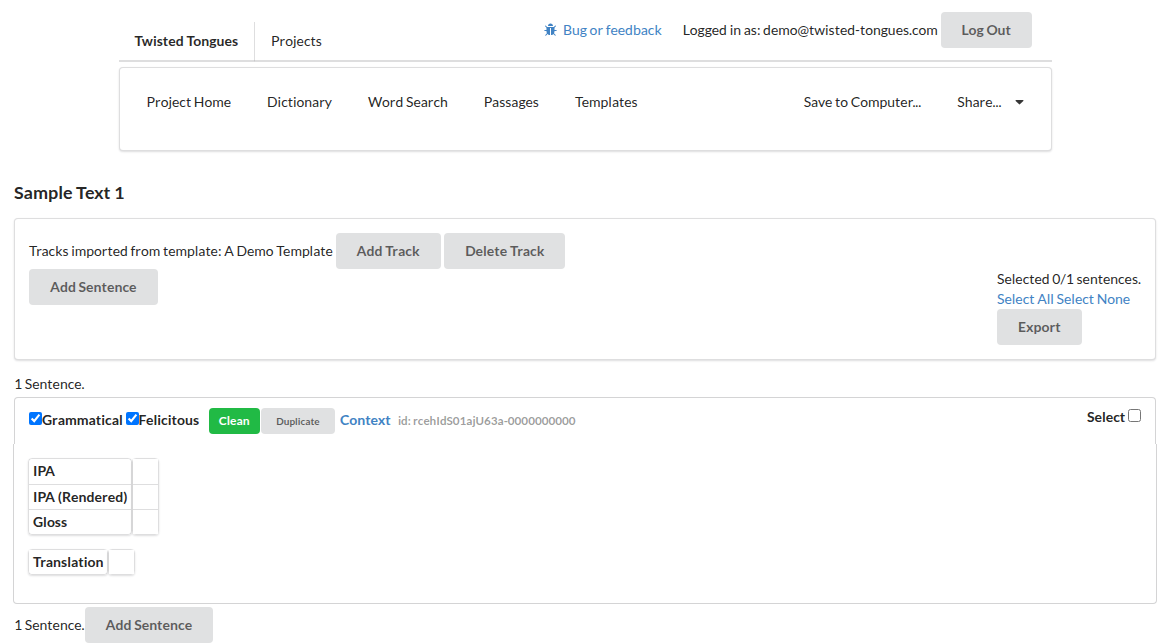
Figure 15. Adding data to a passage before saving.
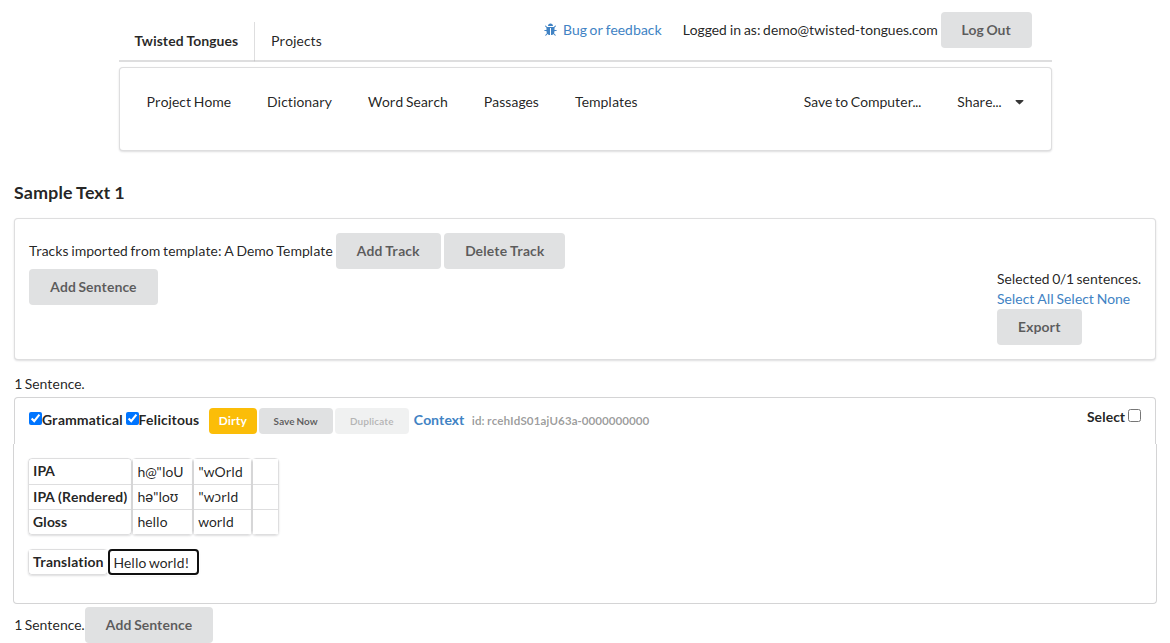
Figure 16. Conflict button.
4.3Keyboard shortcuts for data entry
When a user’s cursor is in a “text”-type track, the space bar can be used to advance to the next word in the sentence. Alternatively, the tab key can be used to advance vertically down to the next track. These shortcuts greatly speed up the data entry process, such that one does not need to click on each cell to fill in each transcription, gloss, etc.
4.4T2IPA entry
If using a track of the type “T2IPA”, data should be entered as code following the guidelines of the tipa LaTeX package. The rendered characters will appear on the line immediately below, which is labelled “(rendered)”. A superscript X can be added as “^{X}” (quotes not part of what should be entered). Diacritics can be added using keyboard shortcuts (é) or tipa notation (\’e). For any tipa code that begins with a \ (except the ~, ‘, and ` diacritics) a space must be entered following the end of the code, before the next segment’s code is added. Multiple diacritics can be added to a single segment with no issue. This will render correctly in the database and export function. To exemplify the entry and corresponding rendering, the code “\textltailn On^{w}O” will result in the rendered “ɲɔnwɔ.” Within a single cell of a T2IPA track, dashes that are not part of tipa codes will be interpreted as morpheme boundaries and segmented in the morpheme-by-morpheme dictionary. Equals signs “=” will be interpreted as clitic boundaries and will also be segmented in the dictionary.
4.5Gloss line entry
In any text-type track, capital letters will be exported as small caps for glossing purposes, following the Leipzig Glossing Conventions; this can be switched off per track when exporting (see section 4.6.3). Dashes within a single cell are interpreted as morpheme boundaries and segmented as such in the dictionary. Equals signs “=” are interpreted as clitic boundaries and are also segmented in the dictionary.
4.6Exporting passages
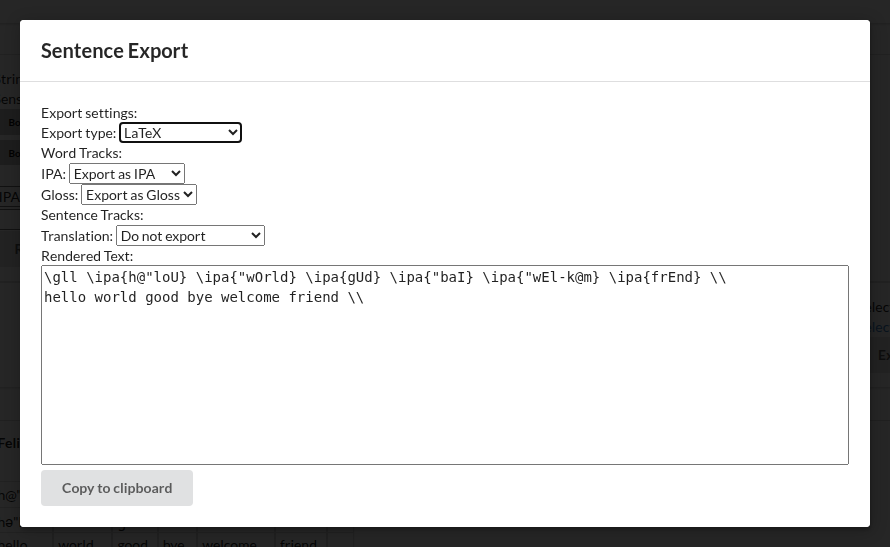
To export a passage, click “Select All” at the top right of a particular passage, and then click “Export”, right underneath “Select All”. To export one or more sentences from within a passage, click the check box on the right of the sentences you’d like to export, and then click “Export”. Upon clicking “Export”, a pop-up window will appear (Figure 17).
TT provides three types of export: LaTeX code, formatted text (convenient for pasting into a document or an email), and tab-delimited text (convenient for pasting into a spreadsheet). You choose between them at the top of the dialog, and the settings offered below depend on which you pick.
The result appears in the box at the bottom of the dialog and updates as you change the settings above it. “Copy” places it on the clipboard; nothing is downloaded. To save an entire project to a file instead, see section 2.3.
Figure 17. Sentence Export in LaTeX format.
4.6.1Export type
The three export types are chosen here, labelled by what you are exporting for.
- A LaTeX paper — LaTeX code: numbered interlinear examples with aligned lines and a free translation, ready to paste into a document.
- A document — formatted text, for Google Docs, Word, Slides or an email. Words stay above their glosses, so the alignment survives the paste.
- A spreadsheet — tab-delimited text, one word per cell, for Sheets or Excel.
4.6.2Advanced options
A folded section headed “How it is written”. Its summary line lists the current settings, so they can be read without opening it. Which choices it offers depends on the export type.
For a LaTeX paper:
- Notation — how the phonetic line is written.
- tipa — ASCII, as
\textipa{\!b}. Compiles under any engine, but the document has to load the tipa package (see section 4.6.4), which can be awkward to add to an elaborate template from a publisher. - Unicode — the characters themselves, as ɓ. Needs XeLaTeX or LuaLaTeX, and a font with IPA coverage, but no tipa package.
- tipa — ASCII, as
- Interlinear package — which package's commands the example is written for: gb4e (recommended), expex, or linguex. TT writes the aligned lines using the command that package uses for the number of lines you are exporting. Note that stock gb4e defines only
\glland\glll, so an example with four or more aligned lines needs langsci-gb4e, a widely used drop-in replacement that defines more; the export writes the command either way, and a package that does not define it will fail by naming it rather than producing something wrong.
For a document or a spreadsheet:
-
How small capitals are written — this decides the encoding, and what survives depends on which half of the styling the receiving editor keeps.
- Small capitals — uppercase with styling. Recommended: where styling is kept you get true small capitals, and where it is lost you get capitals, which still read as a gloss.
- Small capitals, lowercase — lowercase with styling. Better in Google Docs specifically, which keeps one styling property and drops the other. The trade is that if all styling is lost, the gloss arrives in lowercase.
- Plain capitals — no styling at all.
This choice is unavailable, with a note saying so, when no track has “Detect small caps” switched on — there is then nothing for it to write.
For every destination:
-
Characters — whether accented characters are composed or decomposed. This is not a choice about how anything looks; both are identical on the page and differ only to software.
- Composed — á is one character (NFC). What other software expects.
- Separate marks — á is two, a plus a combining acute (NFD).
This choice is unavailable when the notation is tipa, since tipa is ASCII and has no characters to normalize.
4.6.3Choosing tracks
Below the folded section, every track in the passage is listed with a checkbox, so you can leave out tracks that are useful for searching but not for publishing — a notes track, or one holding syntactic categories.
Word tracks are the ones that align word by word, and each carries two further switches:
\textipa all(LaTeX with tipa notation only) — write the whole line in tipa notation. With it off, only the parts that need it are wrapped, which leaves ordinary text as ordinary text.- Detect small caps — anything written entirely in capitals, whether a whole word or a part of one set off by a dash or a period, is taken for a grammatical category and set in small capitals:
3SG,child.PL,Marcus-POSS. Because it applies only where the capitals run the whole way through, an ordinary proper noun is left alone. Switch it off for a track where capitals mean something else, or one holding an acronym that is not a category.
Sentence tracks are listed separately and have only a checkbox. A sentence track holds one value for the whole sentence and becomes the free translation, so there is no word-by-word wrapping to choose and no capitals to detect.
4.6.4The preamble
For a LaTeX paper, a folded “Preamble” section gives the lines your document needs to load, once, for the export to compile, and names the engines that combination works with. What it contains depends on the notation you chose.
With tipa notation, which compiles under pdfLaTeX, XeLaTeX or LuaLaTeX:
\usepackage[T3,T1]{fontenc}
\usepackage{gb4e}   % or langsci-gb4e, for more than three aligned lines
\usepackage[tone]{tipa}
The order matters and is not the obvious one: gb4e and tipa both define \|, and whichever loads second wins, so tipa is loaded after the interlinear package. The dialog says so beneath the preamble when both are selected.
With Unicode notation, which needs XeLaTeX or LuaLaTeX:
\usepackage{fontspec}
\setmainfont{Charis SIL}   % or any face with IPA
\usepackage{gb4e}   % or langsci-gb4e, for more than three aligned lines
Any font with good IPA coverage will do in place of Charis SIL.
4.6.5The legacy export
A link at the foot of the dialog switches to the export TT used before, and a link there switches back. The choice is remembered in the browser you are using.
It is not documented here, and it will be removed in a future release. If you find you have to use it, please tell us what the current export is missing.
5Word Search
The Word Search tab allows users to search the content of all passages for strings of characters or using regular expressions (RegEx). Any track name (see section 3) from any passage can be searched, and multiple tracks can be searched simultaneously. This tab can also be used to find and replace strings across the entire project.
5.1Search options
There are two blue “toggle” buttons at the top of the Word Search page. This section covers both of their functions.
5.1.1Strings versus RegEx
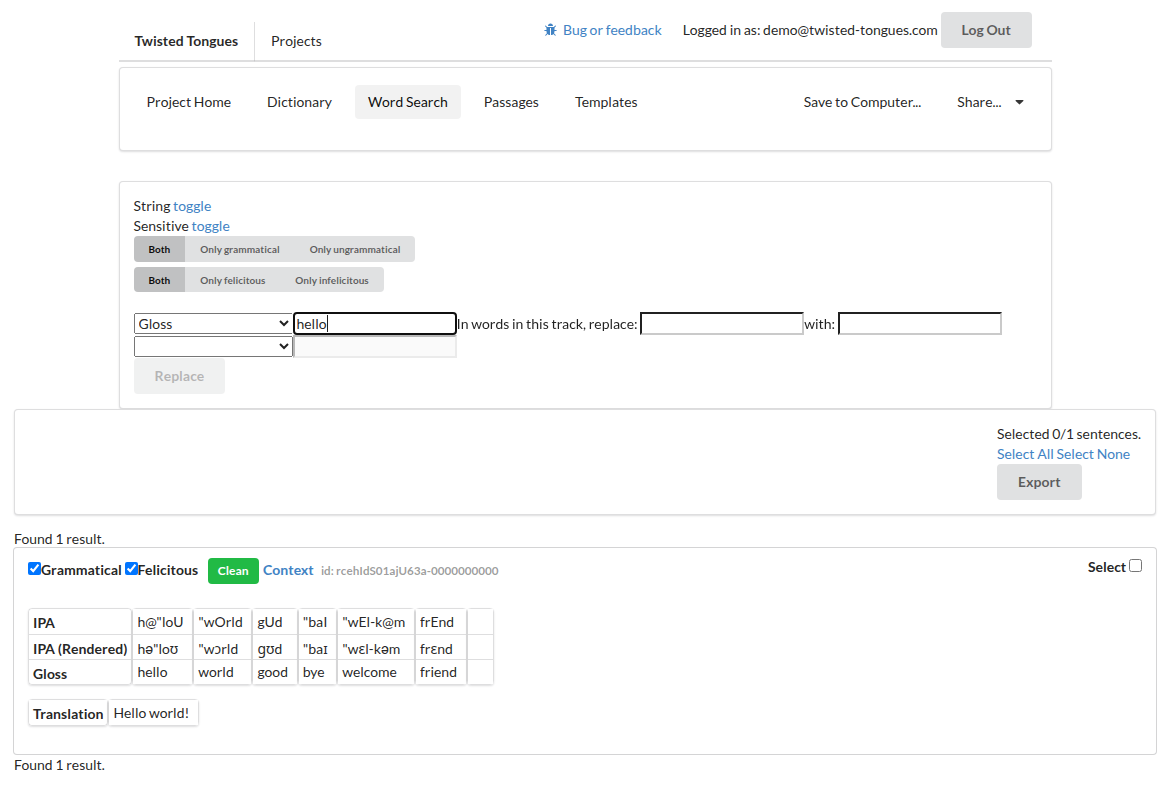
At the top left of the Word Search tab there is a blue “toggle” button, which is set to String Search by default (Figure 18). The default setting allows users to type any string of characters into the search bar and search all passage content for that string. Clicking on “toggle” allows users to instead search using RegEx, which makes it easier to search, for example, for specific characters or glosses only at the beginning or end of a word, or to add an “or” operator into the search.
Figure 18. Word Search.
5.1.2Search sensitive to diacritics, or not
The second blue “toggle” button at the top of the Word Search page determines whether the search is sensitive to diacritics in the search string. In the diacritic sensitive search, typing “a” into the search bar will return all sentences containing an [a] with no diacritic in the chosen track. In the diacritic insensitive search, typing “a” into the search bar will return all sentences containing an [a] with any number of diacritics in the chosen track, including [á, à, â, a], etc.
5.1.3Searching ungrammatical and infelicitous sentences
Sentences in a passage can be marked (by clicking the appropriate checkbox) as ungrammatical (in which case the sentence background turns red) or infelicitous (in which case the sentence background turns yellow). Ungrammatical sentences are exported with an initial asterisk and infelicitious ones with an initial hashtag. In the Word Search tab, if you would like to search only grammatical, only felicitious, only ungrammatical, or only infelicitous sentences, the appropriate gray box above the search results can be selected; the default is that all sentences, including ungrammatical and infelicitous ones, will appear in search results.
5.2Search by track name
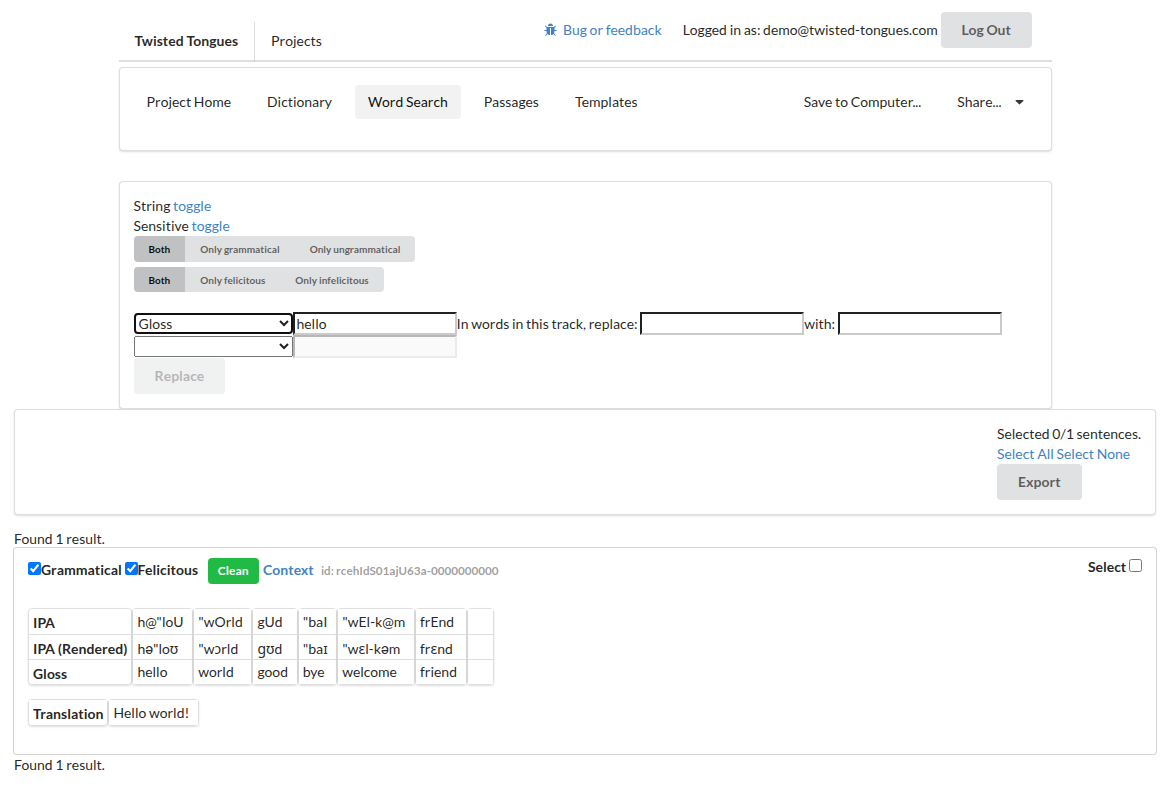
When searching, users must choose a track name from the dropdown menu (Figure 19). All track names from all passages should be present in the drop-down menu. If two tracks share very similar names, but not the same name, both will appear in the drop-down menu and must be searched independently. For this reason, users are recommended to use templates to define track names, rather than creating new track names for each passage.
Figure 19. Drop-down menu.
5.3Search multiple tracks
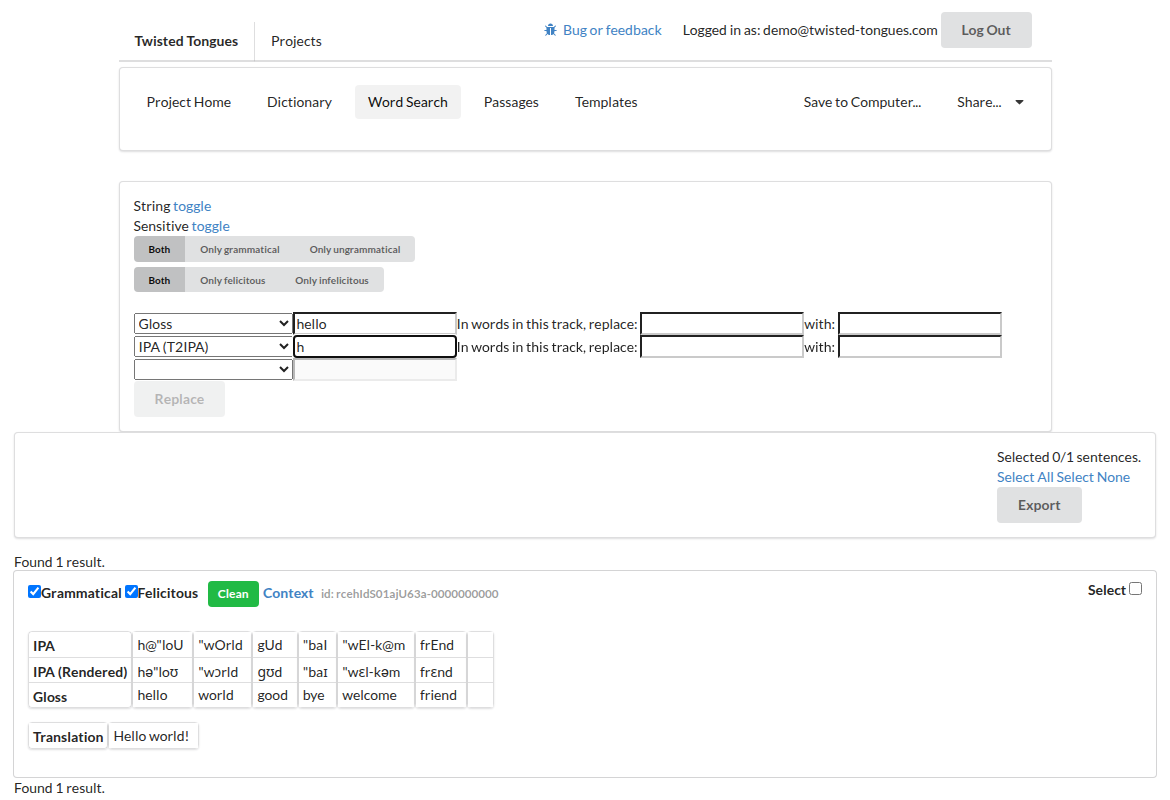
A user may search multiple tracks simultaneously. For example, if there are multiple plural allomorphs and you want to see all cases where the PL morpheme is pronounced as [a], you would search for the string “PL” in the Gloss track, and the string “a” in the IPA track at the same time. Users can search as many tracks simultaneously as they’d like, but hits will only include those sentences which contain ALL of the searched strings or which match ALL of the regular expressions searched for (Figure 20).
Figure 20. Search Multiple tracks.
5.4Context button
Next to each sentence that is a match for a given search, there is a “Context” button (cf. Figure 18). Clicking this button opens the sentence's passage scrolled to that sentence, which is highlighted, so a user can view the larger context in which that sentence was spoken. The address of that page does not change, so a user may copy it to share the sentence with a colleague who has access to the project, or keep it in a list of examples. Such links will continue to open the same sentence in future versions of TT.
5.5Find and replace
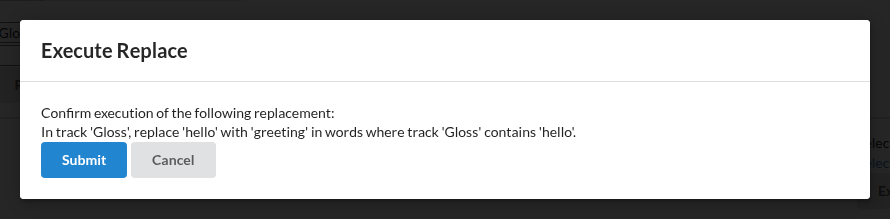
Within the Word Search tab, when a particular search string or regular expression is matched, users can choose to replace that a string in the matching sentences with another string using the boxes at the top of the screen, where it says “In words in this track, replace ____ with ____”. The blanks can be filled in with any string of characters by the user (Figure 21). Note that this change will override what has previously been entered in the corresponding sentences. Upon entering strings into the blanks and clicking “Replace”, the user will be prompted to confirm this change (Figure 22). If the change is made in a large number of sentences, it may take a few minutes for the site to load while processing the change.
Users are cautioned to use the “find and replace” tool with care, because once the replacement has been finalized, the user no longer has access to the previous forms.
Figure 21. Find and Replace, step 1.
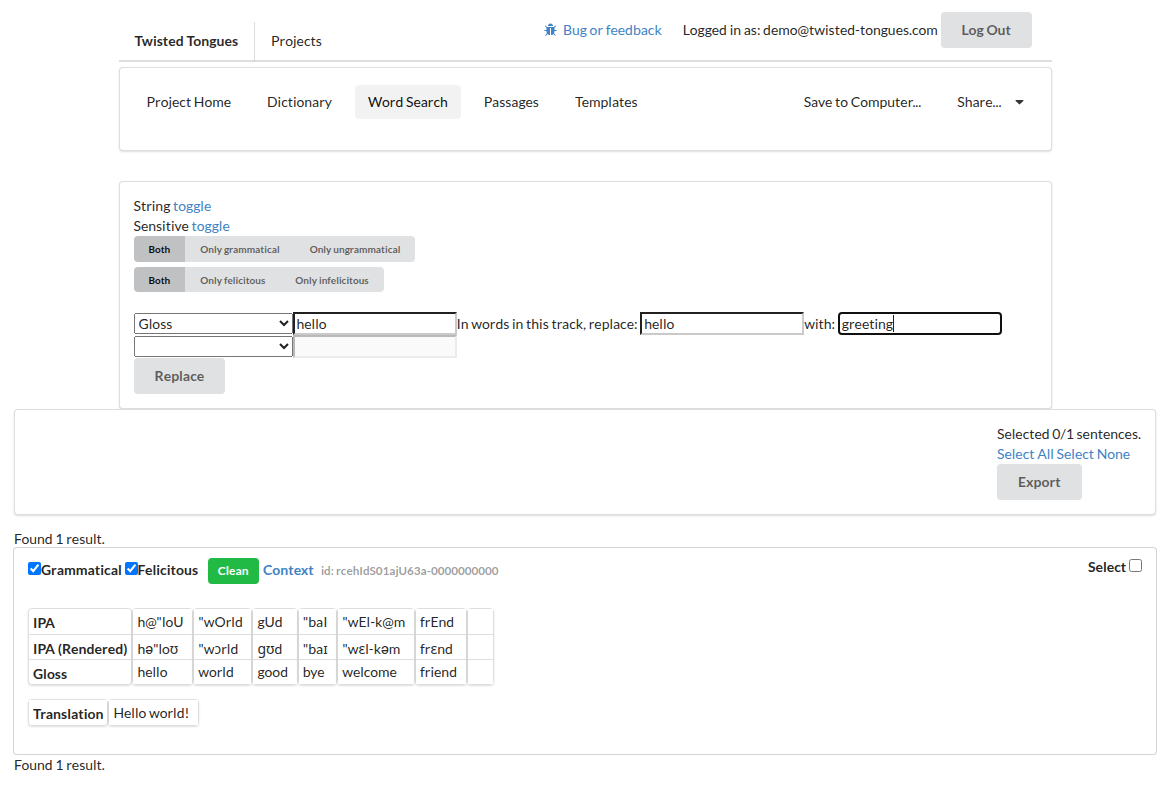
Figure 22. Find and Replace, step 2.
5.6Exporting searched sentences
To export the results of a search, one can “select” individual sentences using the check box on the right of each sentence, or can select “Select All” at the top right of the page, then click “Export” under the “Select All button” and proceed as directed in section 4.6.
6Dictionary
Upon clicking on the “Dictionary” tab, users will see an alphabetized list of all distinct words in the dictionary. Words are defined as all characters entered into a single blank/tab in any T2IPA or Text type track in the Passages tab. Any character difference among two words will result in two distinct dictionary entries. To view each morpheme, rather than each word, separately, click on the blue “Switch to Morpheme” button at the top of the page (Figure 23). Morphemes are defined as words, or parts of words separated by a dash or equals sign. Assuming that there are the same number of dashes on the IPA and Gloss line, glosses will correctly align with transcriptions of each morpheme in the dictionary. When the number of morphemes does not align on the IPA and glossing tier, these forms will be highlighted in red in the Dictionary tab. This can be a useful tool for identifying errors in data entry.
Next to each dictionary entry is a button listing the number of occurrences of that distinct word in the Passages in the given Project. Clicking on the number of occurrences leads to a list of all sentences containing that word or morpheme. These sentences can be viewed in the context of their larger passage by clicking on “Context” next to a given sentence, just as in the Word Search tab (section 5.4).
Figure 23. Dictionary search function.
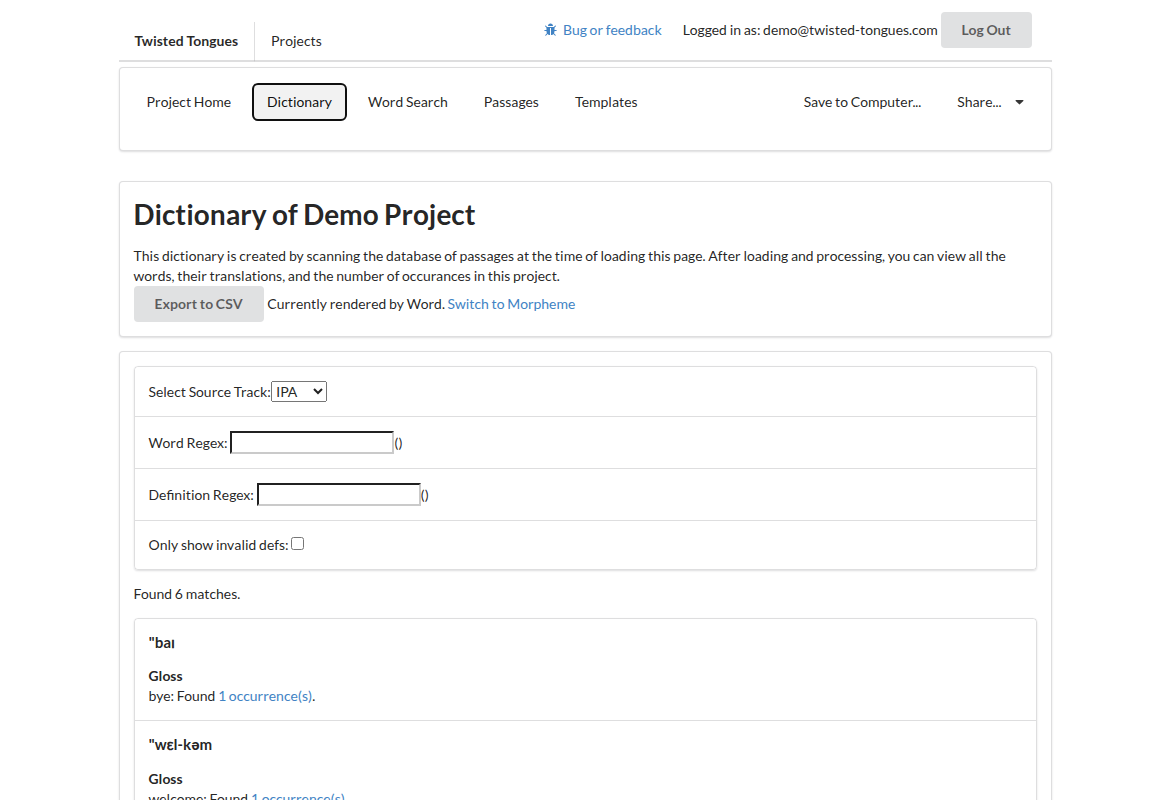
The full dictionary can be downloaded by clicking “Export to CSV” on the Dictionary page (Figure 23).
7Permissions
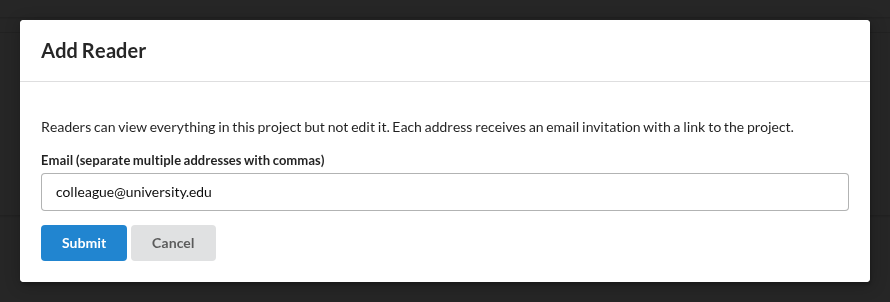
Each project is only accessible by its owner and individuals who have been given access by the owner. The owner can grant access to a project from the “Share…” menu at the top right of the menu bar within the relevant project (Figure 24). Choose “Add Writer” or “Add Reader” according to the access you want to give, and enter the email address of the person being granted access (Figure 25). Click “Submit”. “View Shares” in the same menu lists everyone the project is shared with; a person marked “invited” has not yet logged in to TT with that address, and the button beside each one removes their access.
Figure 24. Sharing a project.
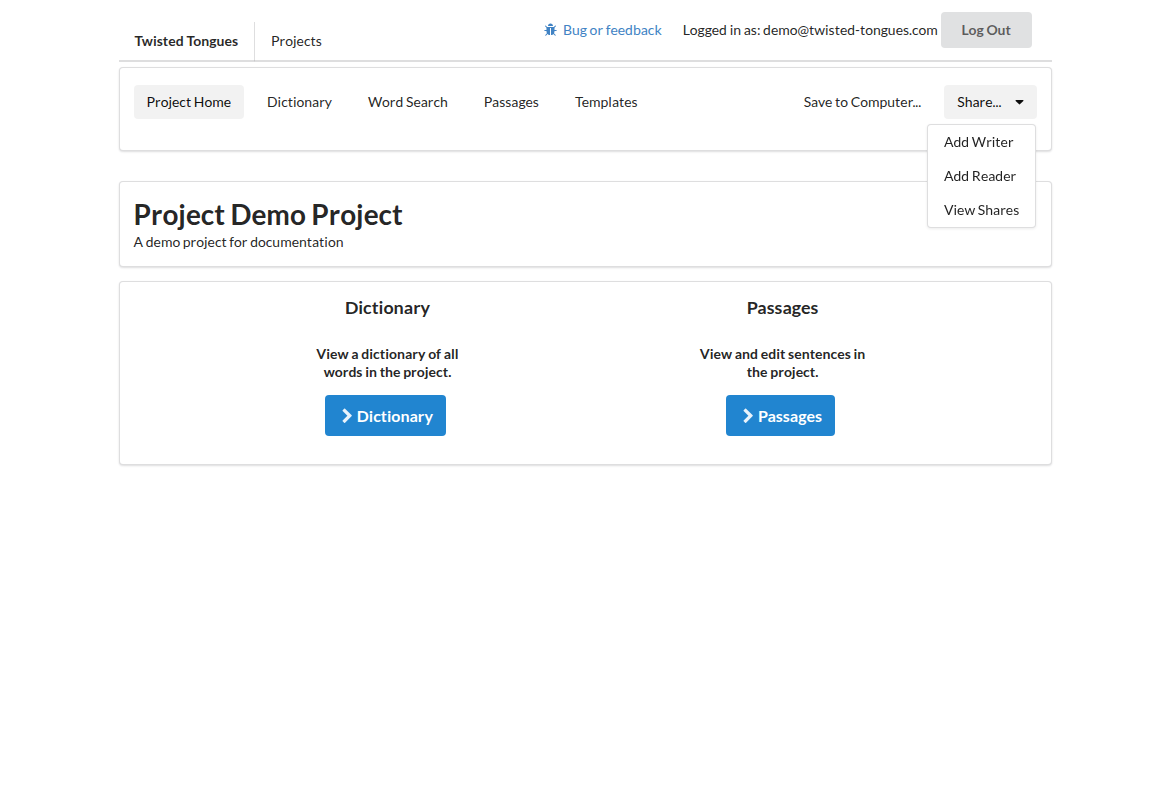
Figure 25. Add Reader.
7.1Writers
Writers are people who have edit permissions on the project. Almost all functions that are available to the creator of the project are available to writers.
7.2Readers
Readers are people who can view but not edit a project. Readers can view and export data as writers can, but cannot add new data.
8Questions?
If you have questions about the site, or if something is not working as it should, please email twisted-tongues-team@googlegroups.com.